

How To Edit Raw Images In Corel Paint Shop Pro
Using the Camera RAW Lab in Corel PaintShop Photo Pro X3
If you're using a DSLR, or mayhap i of the loftier-terminate digital compact cameras, then yous'll be aware of the RAW file option for capturing the highest quality images. This RAW data, all the same, is not an image file and must exist converted into i. Indeed, that's what happens when yous select ane of the JPEG quality options from your camera carte du jour – the camera's RAW conversion engine applies your settings and the resulting image is compressed and saved on the retentiveness carte du jour. Choosing RAW file option as opposed to JPEG allows you to process your images using the computer, and provides a lot more control of the image, particularly of white balance and exposure afterward the photo was taken. Corel® PaintShop Photo® Pro X3 (PSPPX3) supports many popular digital photographic camera RAW file formats. With a broad selection of adjustments post-capture, processing RAW files in (PSPPX3) is simple, fast, and non-destructive, meaning you can adjust your images in the RAW Lab not simply once but over and over again to go the results y'all want without degrading the original RAW file.
In this tutorial, we're going to reveal a typical workflow for dealing with RAW files in PSPPX3'southward new Camera RAW Lab.
Download tutorial images (.zip 10MB)
Step oneOpen Photographic camera RAW Lab from the Organizer
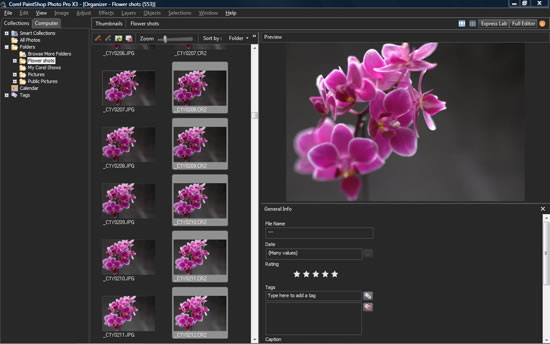
Permit's assume you already take your photos downloaded from your camera or memory carte du jour, and that you lot're looking now to open your RAW images in PSPPX3.
You can edit ane epitome at a time, or apply the edits in a batch – useful if the images were shot nether the same lighting atmospheric condition.
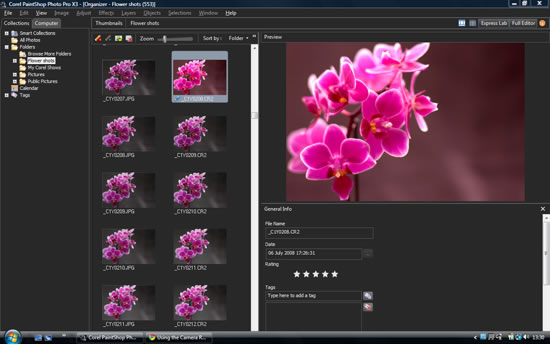
Select single images from the Organizer by left clicking on the thumbnails, or if you desire to load as many as v images into the Photographic camera RAW Lab, click each one while at the same fourth dimension holding down the Command push button (Ctrl).
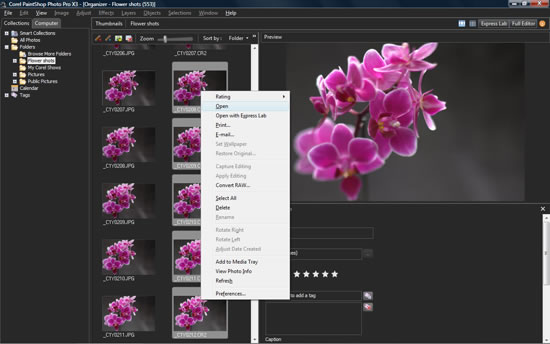
Now, right-click and from the popular-up window select Open. This will add all of the images selected into the RAW Lab.
Tip:
PSPPX3 has a customisable interface, and I like my thumbnails bundled vertically; it makes good apply of the widescreen format. From the Thumbnail Fashion, click and drag the outer frame of the scroll bar (far right) inwards to reveal the Preview Pane.
Click and drag the aforementioned point once more to adapt the width of the thumbnail pane. In this case, simultaneously captured JPEGs and RAW files sit side-past side.
Fixing White Residual
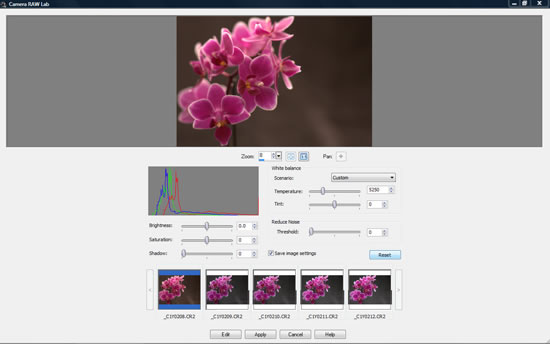
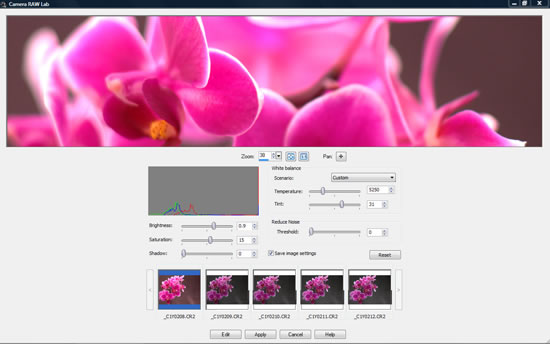
Step 2Select a WB preset
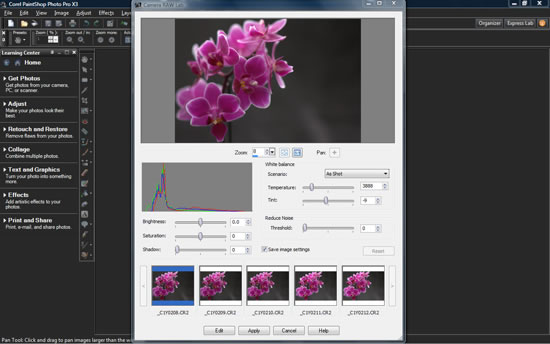
Let's look at how you piece of work with one prototype at a fourth dimension. So click on the image to highlight it. I usually fix unsightly white balance issues get-go, followed past exposure. I've likewise expanded (maximised) the workspace for clarity.
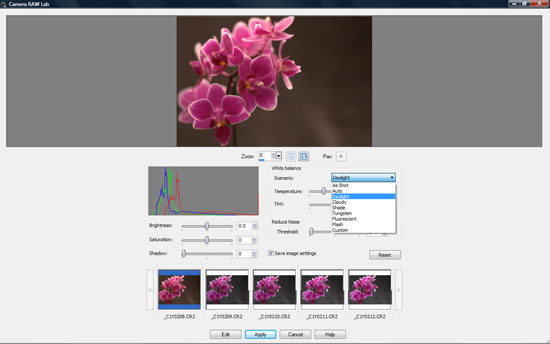
By far the easiest and quickest way to tweak white-residual is to caput over to the Scenario pull-downwards menu with its seven presets. Use theUp/Down arrows on the keyboard to see the furnishings on the prototype, rather than the track-pad or gyre-wheel, as they may not piece of work.
If your photograph was taken nether indoor lighting, try the Tungsten or Fluorescent presets, or if you've taken the shot outdoors, the Shade orCloudy presets will reduce the cool blue tint that can be seen at times.
If you lot inadvertently set the camera's WB setting to Tungsten when shooting outdoors, simply select one of the daylight balanced presets, or Auto, and the new white rest setting will exist applied non-destructively.
Step threeFine Melody Color Temperature
Selecting one of the above presets may be enough, but if there's still a tint visible, you'll desire to adjust the Temperature slider. Dragging this slider to the left adds blue and makes the image cooler looking, while moving the slider to the right adds yellowish, making it wait warmer.
You could miss out the WB presets if you lot want, but they're very handy for getting a quick approximation. You now only need inch theTemperature slider slightly to brand boosted corrections.
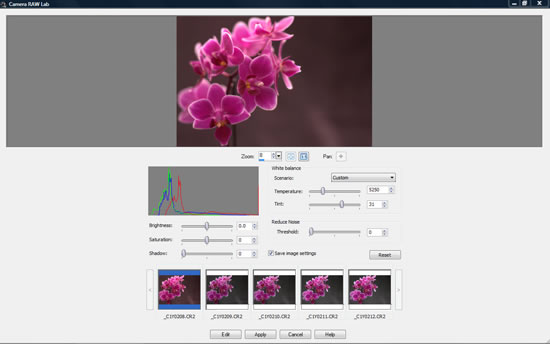
Footstep 4Conform Tint
If, afterwards that, at that place's still a slight tinge that you can't remove, try the Tint slider located immediately beneath the Temperature slider. It may help. Again, you'll only want to make a slight adjustment, then inch it advisedly to the left to add Magenta (red), or to the right to add Cyan (blue).
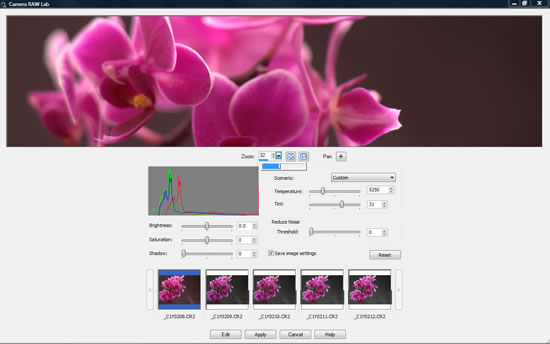
Naturally, slight adjustment is subtle, so you may desire to zoom in - click and hold the down arrow in the Zoom tool. To restore the image to its original size, hit the Four-way arrow button to the right.
While you're aiming to make the colours look neutral, information technology'due south really downward to personal taste. And so, it's important to recall, at that place's no real correct or wrong option.
Fixing Brightness
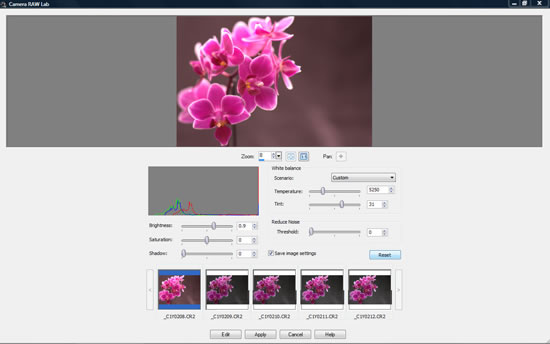
Step 5Fine-Melody Effulgence
We desire to tweak the brightness side by side - the Brightness slider is used to lighten or darken the mid-tones - and like the majority of adjustments in the RAW Lab, it's a example of using a simple slider.
If, however, the exposure is out past a long way, you'll likely want to adjust this first in the chief editor. Just for the purpose of this tutorial, we'll presume the images selected and loaded into the RAW Lab crave only a slight tweak.
Our sample shot needs to be lightened slightly so head to the Effulgence slider and shift information technology over to the right, while watching the Histogram for highlight clipping. Click on the i:1 button and pan by clicking and dragging the prototype effectually the brilliant areas for signs of item.
Step 6Fine-Tune Saturation
Past now the paradigm may expect a lilliputian lifeless, then edge the Saturation slider to the right. Once again, it'due south a personal option, depending on the image, but I generally similar deep, vibrant colours. Yous tin can be quite assuming here with the slider as the Saturation aligning in the RAW Lab is quite subtle.
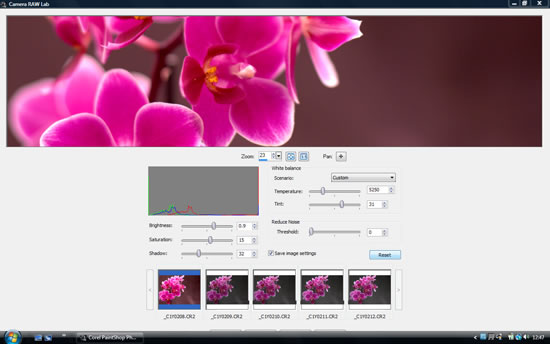
Step 7Deepen Shadows
The Shadow slider is used to add together blacks in the shadow areas – useful if your epitome looks done out to brainstorm with. Dragging the slider over to the right will generally increase saturation too, and then if you've already made adjustments and the paradigm looks fine you may desire to leave the Shadow slider lone.
Recall none of these adjustments degrade the image – it's just a preview of a set of instructions. So, if you don't like the look, drag the slider dorsum – there's no impairment done.

Stride 8Noise Removal
In our penultimate footstep using the RAW Lab we want to check for unsightly noise – the ugly coloured speckles and grain nearly often seen in the shadows or in big tracts of unmarried colour. For all that, information technology's generally but an issue if you've used a high ISO setting on your camera. And it's worth bearing in heed that racket is commonly more noticeable on-screen than in a impress of the same prototype.
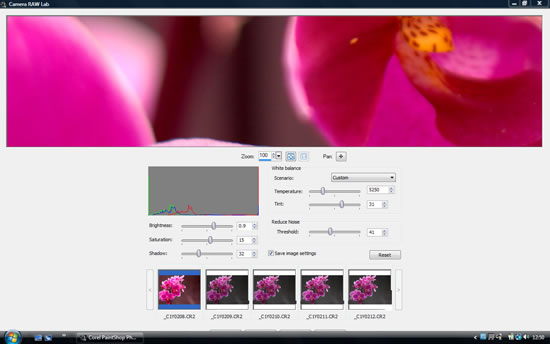
Hit the i:ane Push button nether the prototype preview and so, using the Pan option, elevate the selection to inspect the troublesome areas. Inch theThreshold slider to the right while watching advisedly for halos (edge shadows) and other artefacts, such every bit noise.
Footstep 9Save Settings
Get out the Save epitome settings box checked, so they'll be remembered each time you open the file in the RAW Lab - that's handy if you inadvertently close the RAW Lab for whatsoever reason. Now, click Employ, which does more than or less the same thing (Edit applies the adjustments and opens the file in the main editor, Cancel closes the Lab and resets the adjustments - if the Salve image settings box isn't checked). The corrections will be practical to the image and you'll exist taken back to the Organizer.
Step x
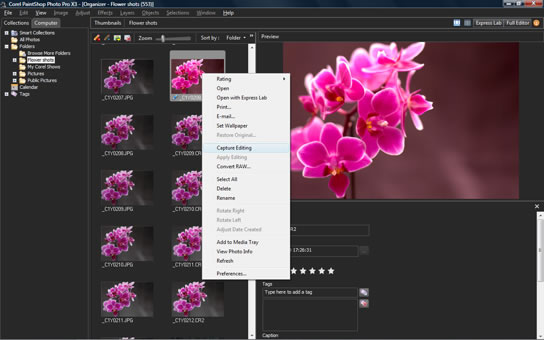
If you lot want to apply the adjustments to other RAW files, now is the time to do it. I didn't make any adjustments to the other files loaded into the RAW Lab, so I'll apply the same settings to those now. Select the original RAW file, then Correct-click and from the pane select Capture Editing.
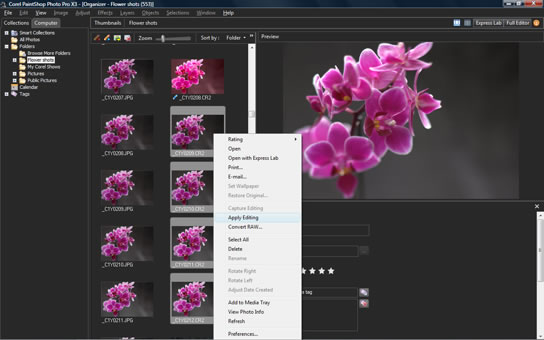
Now, select the images (printing and hold Ctrl to select multiple images), and then Correct-click once more and choose Use Editing. Look for the spinning hoop, as the adjustments are applied, and so you'll encounter a tiny Pen icon bottom left of the thumbnail and the changes in the images in the Organizer.

At present, you tin open the images and work on them in the main editor, to add together sharpness or catechumen to JPEGs for sharing. Alternatively, if you want to edit them again in the RAW Lab, then you can, knowing that any farther adjustments are done in the Lab without image degradation. Bang-up.
© copyright 2010, Kevin Carter

Source: https://kb.corel.com/en/127162
Posted by: millersircond.blogspot.com
0 Response to "How To Edit Raw Images In Corel Paint Shop Pro"
Post a Comment